Monday, January 31, 2011

Thou shalt not pass up anything good in thrift stores.

Yeah, thats a commandment. Right in there under "Thou shalt not covet my neighbors floor plan".

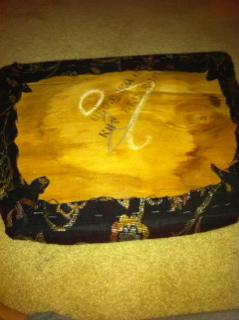
 Happy Monday, everyone! I hope you all had a great weekends! I wanted to take a moment to share some of my thrifty finds of the past week. Contestant #1 is this super neat buffet which folds out (pictured) to accommodate oodles of goodies for parties, and then folds right back again. Fun! I've been looking for a buffet, but most are just too bulky- what an awesome compromise. This might just be the thing for my Valentine's Day crafternoon party!
Contestant #2 is the craigslist chair that I scored, all primed and ready for her custom paint job. I haven't decided yet how much I want to distress the legs, its such pretty detail so maybe just a little to highlight the shape.

Then we've got this sweet little side table, who would just LOVE to go into a reading nook somewhere. He's pretty plain (yes, it's a 'he') so I think maybe we'll jazz him up with some cabana stripes.  

Who's got two thumbs and had a super productive weekend? Answer: This girl. 

What do you guys think? What finishes are you seeing for these guys?? You know me, I've already mixed about 10 shades of gray, but I'd love to hear what else you think might work! 
xo,


Friday, January 28, 2011

When Post-It's Fail...


I am very sorry to say that this is EXACTLY what it looks like. I sent my husband a meeting invite to remind me to get paint from the garage before heading out to the office.  For the record, he declined my invitation. 

I have been forgetting to put the paint in the car for about a week. 
This paint in question was actually a total mistake. I needed to get paint matched for this white chair: 
And Stupid Home Depot color matching gave me gray instead of white. But really, when have I EVER complained about that? I wound up using it on this side table: 
I'm pretty sure you guys are sick of seeing pictures of this bad boy around, but incidentally, I am not. I visit her often in the guest bedroom. 

I started work on the other side table last weekend with my new paint sprayer and TOTALLY ran out of the quart in no time at all. Seriously, folks, you need to get a gallon of paint if you're going to use the sprayer. Naturally when I ran out to Home Depot to get more matched, guess who forgot the paint to GET matched. *raises hand* 

No worries, not being one to ever be bored in HD, I got some MORE gray paint that I'm using on THIS chair: 
(are we noticing a trend?) 

I'm going to try my hand at upholstering the caned back this weekend- wish me luck! You guys got any fun (or daunting) projects planned for this weekend?

xo, 

Wednesday, January 26, 2011

Spray Paint vs. Paint Sprayer

 Remember when I got this for Christmas??

Well, I finally got up the nerve to use it this weekend! And, let me tell you, I have been living in the darkness. This paint sprayer is AMAZING. 


What you're seeing are two separate chairs. Same style, but different painting methods. Chair "A" was painted with Rustoleum Spray Paint. It took two cans, two coats and LOTS of detail painting with a craft brush. Chair "B" is the sprayer experiment victim. It took me less than a minute to do the whole chair. No lie. There's some detail painting that needed to be done around the top and legs, but I think I'll take   > 1 minute over the hours of stinky spraying, and waiting for it to dry, only to re-coat with spray paint.

Time to paint 1 chair, including detail touch-up: 
Spray Paint: 5-6 hours
Paint Sprayer: Less than 1 hour  

PROs: 
  • Sprays very even coat of paint in very little time
  • Easy cleanup (of latex paint) with water
  • Can spray any color of paint you want. You can even mix custom colors and no thinning required of latex or oil based paint 
  • Latex paint is much higher quality, and gives the furniture a smooth, buttery finish, even if you over sanded ( like I did) 
CONs: 
  • VERY messy. You'll need a lot of ventilation and a lot of tarp, not only for spraying but for cleanup. You can see my makeshift paint booth in back of chair "B".  M-E-S-S-Y. 
  • Some practice required to prevent drips 
  • Uses a LOT of paint. Since most of it ends up, not only on the thing you are painting, but on the surrounding areas too.  
This works well if you are:

  • Going to be using latex paint and/or want to have control over your colors. You can use oil-based, but who wants to deal with this kind of cleanup with mineral spirits? Not me. 
  • Have projects with lots of sides/angles
  • Have a large space in which to spray
  • Are time-sensitive and have lots of items to paint 
My final thoughts- being able to control colors and save time definitely beat out the messy operation and cleanup. I spent about twice as long cleaning up as I did actually spraying. Now, given that spraying a chair took less than a minute, I think that's not too bad, especially if you've got more than one thing you need to paint.  

xo,

Tuesday, January 25, 2011

I Heart Discount Fabrics

Look at my pretty fabric! 3.75 yards for $25 y'all! 
I put a quarter on it so you can see the scale. 

so many options! 

Maybe it can be friends with this?
(Look familiar?? This one is gray though!) 

Or maybe the new chair I got today for F-R-E-E!!!


Sorry for the poopy quality, this is the picture that enticed me on craigslist. The caning is busted, but with a bit of ingenuity and some crafting cajones, I'll upholster over it to give it just the pretties silhouette this side of the Mississippi. I think I just might go with option #2... Thoughts???

xo,

Tuesday, January 18, 2011

Post-Holiday Greenery: Moss Balls

I had to explain to a very confused hubs several times as to why I was going to Michael's to make "moth balls" (or so he heard) this weekend. After some very descriptive gesturing and shooting each other looks, we established that it was Moss (not moth) balls we were after. Progress.

Well, I did two different things with my moss balls. I'm sorry, but it's just really fun to say. Moss balls. Moss balls. I'm done.

I made a topiary a la my previous post on Holiday greenery. I bought all the necessary components, except I couldn't find any boxwood ANYWHERE, so using moss is a great alternative, plus it really fits into any season. 
I also made moss balls (there I go again) in varying sizes to display in my hurricanes and clear glass containers which, up until recently, still held ornaments. 


Overall, I'm really pleased with the result, and these were really easy to make.
For the topiary, I got two different kinds of moss, the green kind that comes in sheets (I got 3 packages and it made about 7 balls of varying      sizes) and the dried spanish moss that comes in the bag for the base.

To secure the moss to the styrofoam floral ball that I used for the base of the ball, I actually used straight sewing pins instead of hot glue.

Worked like a charm!  Just roll the moss sheet around the ball and secure with straight pins until covered.
Make cuts wherever you need to to overlap the remaining area. You can use the bits you trim off to cover any bald patches.

It will look sort of wonky, but never fear, just trim off the excess and smoosh (yes, this is a technical term) the edges together to cover the styrofoam.
Et Voila! You, my friend, have made a moss ball. 

To make it a topiary, make sure you have a styrofoam base, a stick or piece of wood cut to the appropriate height, a vessel and some hot glue.  Then, make a sort of pilot hole by jabbing (yes, another technical term) the stick into the base and then the topiary ball, and fill with hot glue, then attach. Hot glue some moss around the base to cover the styrofoam and you're done!  

My topiary pot was originally a terra cotta, but I just spray painted it with some left over paint from my Chair project to give it a crisper look. Not bad for an hours' work, eh? 


xo,


Monday, January 17, 2011

Sugar and Spackle is on facebook!


Happy Monday, Spacklers! For all you lucky ducks that are off today, hope you are enjoying the 3-day weekend! I've been pretty delinquent this past week, I know. First I was sick, then the hubs was sick and it was just one big sick ward. Plus, I was totally loopy on decongestants and definitely have about 5 "draft" posts that made me smile when the fog cleared. Oh, and they have nothing to do with anything. Really. 
This weekend I did do some fun projects, I made moss balls! I forgot my camera cord to upload my photos, but that will be a forthcoming post. In lieu of boxwood availability a la this post, I decided to make topiaries with store-bought moss sheets. They're a must "moss"- see. heh. 

One thing I DID do today was create a page for Sugar and Spackle on Facebook! yay! So if you're looking for something to do on this lazy Monday, head on over there and friend me! 

xo,


Tuesday, January 11, 2011

No Place Like Home

I am homesick... Well, I really should say "housesick" because I want a dang house. It's pretty much like Chinese water torture for me to be in a rental with grungy carpets, bad lighting and the ever present  and much-scuffed yellow-cream walls. I need to sit on my hands to keep from painting, as my husband reminds me "anything we do we have to un-do." Ugh. So wise.  So I just sit there grumbling about how nice a chair rail would look and giving squinty eyes to our living room lighting, which consists entirely of one flimsy light hanging from a ceiling fan. Grumble grumble.  BUT, I will not be beaten! I do what I can with inexpensive fixes like spray painted dollar store frames, and repurposing furniture/accessories that we've accumulated over time. Below is the dining room, and as you can see- we chose to keep our thrifty find of a dining table (scored for only $160) in its natural cherry. 

And the guest room: 


Now, I'm not trying to complain, but I realize that's how it sounds.  TO BE FAIR, we just got married a mere 3 months ago, and up until a month ago, we were living with my parents... so, MAJOR improvement there. But getting inspired from all you guys and seeing all the cool projects you're undertaking totally has got me hell-bent on ownership. 
And, as such, I've made that my goal for 2011. How are you guys doing on your resolutions? Are you abiding by the golden standard resolutions of weight loss and love? Or do you have more specific goals for 2011? I'd love to hear them! 

xo,

And the winner is...

Good morning, spacklers! I want to sincerely thank ALL of you for following and your comments. As promised, we have a winner!! 
The lucky winner of the $50 Home Depot Gift Card OR $50 Towards a blog redesign by Torri of Digital Confections is...

Tara of Lauren Lane Decor!! 

P.S. a la Young House Love giveaways, I used random.org's random number generator 

Really- THANK YOU to everyone who participated and keep checking back, because you'll never know what the next giveaway will be...

xo,

Monday, January 10, 2011

Just when you thought Monday couldn't get any better...

Hi friends! Happy Monday! Just a friendly reminder that today is the last day to enter for the Sugar & Spackle new blog celebration giveaway! One lucky winner will recieve a $50 gift card to Home Depot OR a $50 credit towards a blog redesign by Torri over at Digital Confection Designs! She's fantastic, by the way.

To enter, follow me! It's that easy! For additional entries, leave comments- as many as you like, but let's keep it classy, eh?

Good Luck!

xo,

Sunday, January 9, 2011

Happy Anniversary!

I really cannot believe it. It may seem premature for an anniversary, but 3 months ago today, my best friend and I said "I do!" and I went from Miss to Mrs. Here's one of our photos from our wedding at The Breakers in Palm Beach, FL.


Saturday, January 8, 2011

Sugar & Spackle Portfolio is Live!

Hola dudes and dudettes. My new portfolio page is up and running! What do you think? Some of these items will be familiar to you Spacklers (that's my new name for you! ), but others will be a surprise! I'm happy to answer questions on how I did something and/ or pricing and additional details, because these ARE for sale! Enjoy!


Friday, January 7, 2011

Ornaments, No. Mercury Glass, Yes.

As promised! Now that you've gotten your greenery sitch under control, here's how to keep the blues at bay. If you've got mercury glass still out from the Holdiays, good, you can keep it. The rest of it, OUT! Only in dorm rooms are (white) christmas lights allowed year-round. Don't judge, you know you had some too. 

1. West Elm : $25-75 
2. Midnight velvet: $45 ea
3. Origin Crafts: $15.90
4. Origin Crafts: $23.50
5. Origin Crafts: $9.50

Tutorial: 
What you need: 
Krylon mirror paint, your glass container (with a mouth large enough to fit your hand in to spray paint), paper, spray bottle with water.

Work on a covered surface in a well-ventilated area. Spray the a mist of water into the inside of the vessel, then follow it with the mirror spray paint.  Dry the vase on a drying rack, so that the air can circulate inside. Wait until dry and you're good to go! If someone tries this, let me know how it goes- I've been meaning to, but I've been sick the past few days :(

xo, 

Thursday, January 6, 2011

Lookin' Fresh

Looks like someone's new year's resolution came true! Sugar and Spackle wanted a pretty new look, and voila! here it is!

Many thanks to the fabulous Torri over at Digital Confection Designs for not only designing this, but implementing it too! The girl's got skills.

What do you guys think of the new look?! Become a follower and enter for chance to win either a $50 gift card to Home Depot, or $50 towards a blog designed by Torri! Please note that she only works with Blogger.

Leave comments on any post for additional chances to win! 1 comment (quality, please, and let's keep it classy) equals another entry!

Existing followers are automatically entered! Drawing will be on Monday, Jan 10th, with a winner announced on the 11th.

Good Luck!! 


xo,

Until Next Year, Holiday Pandora.

January/February decorating is tough. You're done with Christmas (or are being forced to abandon your tree *grumble grumble*), No more sparkle, no more greenery, no more soft glow of lights *sob*

I don't know about you, but for me, I would leave my tree up all year if I could. I just love the feeling that it creates in a home. Well, I am determined to keep that warm fuzzy feeling all through the winter months. Granted, it is 70 and sunny most days here in south Florida, but when has that kept me from pretending I'm up north? Never!

Let's break down the components of Holiday decorating:
1. Greenery - Garlands, Trees
2. Sparkle- Ornaments, Mercury Glass, Twinkling Lights, Sparkly pillows and accessories
3. Warmth- Christmas lights, fireplaces, candles, warm colors, warm fabrics like furs (faux of course), velvet, knits, ect...

Regardless of your climate, or even your color scheme, I think these are pretty universal components to any festive decor. This is how I propose to change out my Christmas decor into something more post-holiday friendly, but still maintain the coziness without being the creeper who keeps the Christmas decorations up 'till March. Here's a little thing I whipped up, which is pretty much what I do in my head anyway. I get inspired from a photo, friend, or fellow blogger, research to find cost-effective alternatives, and then I think "heck, I can just MAKE this!".
Greenery: Replace your trees and garland with some fresh boxwood topiaries. These come in oodles of different sizes and shapes for whatever your purpose. Two of a kind or an assortment grouped together on a console or buffet will make you forget about that garland in no time. 

Up tomorrow- the Sparkle! 

Wednesday, January 5, 2011

Thrifty Finds: Dining Chairs - The Reveal!

Let's take a trip down memory lane, back, back WAAAY back to when I got four of these chairs for $50. The caning and overall structure of the chairs was in good condition, they just needed a little love. So here's what I did after removing the cushion for re-upholstering, which you can read how to do here.
1. Scuff sanded the chair with fine grit sandpaper (220+)
Note: The first chair was my "tester", and I actually broke out my power sander to get all the finish off. Do not, I repeat, DO NOT do this. I wound up over-sanding, and the wood, as a result looks splintery and dried out. Not pretty. All the previous finish does not need to be removed, you only need to give the new paint something to stick to. Hence, the scuff sand. See, friends, we are learning together. 

2. Wipe down with a clean dry rag, then a clean damp rag, and then a different clean dry rag to get all the dust off.

3. Now it's time for spray paint. I used Rustoleum's "Heirloom White", and for this particular project, I wound up using about 1 can per chair per coat, if you can fathom that. If your chair has detail that you want filled in, follow my "Tips for Detail Work" Below. When spraying, make sure you use a smooth back-and-forth motion and work about 10 inches away from the surface you're painting to avoid drips. AND WEAR A MASK- This stuff is nasty and you don't want to inhale it.

Tip for Detail Work: Keep several sizes of craft brushes on hand, so that you can get into crevices and detail work before spray painting. To do this, I simply sprayed the spray paint into its own cap and then used that paint to do the detail work. 


4. Wait for the first coat to dry and then go over any necessary areas with very fine grit sandpaper (300/400). Do this lightly as you don't want to strip the paint, you just want to smooth it out. Remove any dust with a rag.

5. Re-coat if needed and allow to dry completely

6. For the finishing touch, I used Minwax wipe-on Poly. I find this is a great thing to use for things with a lot of different curves and surfaces, since you just wipe it on with a clean rag. I was worried that it would be tacky and gloppy, but it went on very smooth. I find it works even better if you go top/down, instead of working against the grain. And when all is said and done, you wind up wiiiiith....

Tuesday, January 4, 2011

Say it, Don't Spray it

I hope Santa was good to you all this year, I know he was to me! This year Santa got me Home Depot Gift cards and a Paint sprayer! (Thanks, honey!!)

I must clarify. This is not a paintball gun. I may have had some confused friends  ( you know who you are) when I exclaimed I got a "paint gun" for Christmas. This is a gun with which to spray paint to achieve a decorative and overall improved look. Not to terrorize neighborhood children. We're clear? good.

At first, I got Husky air compressor with a paint sprayer attachment. It could work, except it's really meant for spraying thin liquids, like varnishes and finishes of various sorts,  not really paint, and any paint I would have to thin out enormously and have a heck of a cleanup - and so I started my research.

I had spent an enormous amount of time researching paint sprayers previously, but I could never find one that was a good overall value. The professional-grade ones start at around $400-$500- yikes!  And I couldn't find a clear answer whether or not they could spray latex and oil based paints. Some sprayers claimed that you could, but the reviews said "no way".  Le Sigh. What is a girl to do?!

I love to redo furniture in paint, but brushes and rollers seriously take forever. A seemingly obvious solution to this is spray paint- but frankly, I'm not a gigantic fan. Maybe I used it on the wrong project ( the upcoming chair reveal), but it was just a gigantic pain in the arse. I cannot wait to use my new paint sprayer. Well, the one I finally settled on was this bad boy:

Graco TrueCoat Handheld Electric Paint Sprayer

Hello, Lover! (said in a Carrie Bradshaw-esqe voice). This is an entry-level sprayer, perfect for small projects like trim, interiors and...furniture! Yay! It claims to spray a bevvy of liquids of varying viscosity including:
  • Oil based paints
  • Primers
  • Stains
  • Varnishes
  • Latex Paints
  • Acrylics
  • Enamels
  • Urethanes

    Oh, did I mention that it's weighing in at a whopping (not really) $199 on amazon.com?? I've got a side table project upcoming that will pit the sprayer against the roller. Round one- DING! 

    Monday, January 3, 2011

    How to Upholster a Chair Cushion

    Also, Happy New Year! I hope you all are having a great 2011 so far! And I sincerely want to thank all of you for following/ reading. My new years resolution is to keep you informed and entertained for ALL of 2011 and beyond! 

    Now, to business...

    Seat of thrift store chair
    taken off 
    When you're selecting furniture that you plan to change, make sure that you make things easy on yourself. For example, if you're looking to change a chair cushion, make sure that it is a seat has a bottom that can be unscrewed. Like so: 
    What you will need when re-upholstering a seat cushion: 
    1. Batting ( can be found at any store where fabrics are sold)
    2. Foam ( can be found at any store where fabrics are sold) 
    3. Fabric ( you can also find this where fabrics are sold) 
    4. Staple Gun
    5. Pencil or pen 
    6. Scissors
    7. Screwdriver
    8. Needlenose pliers or staple remover

    Step 1: Remove seat cushion from chair with screwdriver. Make sure you save the screws if you plan to use them again, or save at least 1 so you can find new screws in the same style. 
    Step 2: Remove existing staples with pliers 
    Step 3: Take removed fabric and lay flat on new fabric to trace pattern and cut it out.  

    Step 4: Trace the seat for the foam and cut the batting in a square, leaving about 4 inches on each side

    Step 5: Fit foam, batting and fabric over the seat like you're wrapping a present, securing each layer before adding the other, and remember to trim off excess fabric. 

    Step 6: After securing the four corners, move around the seat and make sure there are no wrinkles and secure with staples. 


    Et Voila! You've made yourself a chair cushion, sista!